If you're looking up how to tape an ankle, you probably want a little extra confidence before getting back on your feet. Athletic tape can provide temporary support, but it can't tell you whether an injury is safe to walk or play on.
I like to think of tape as a helper, not the treatment. Here's how ankle taping works, what a classic application involves, and why strength and balance still need to do the long-term work.
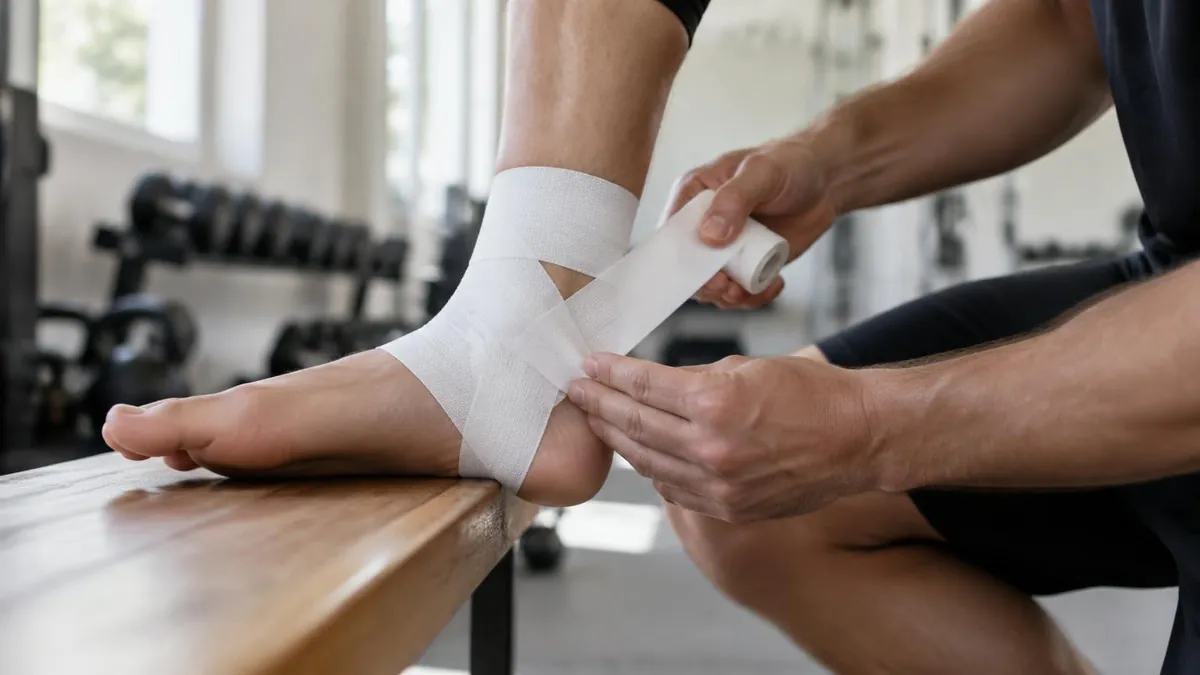
When Taping a Sprained Ankle Helps
Rigid athletic tape limits some ankle movement. It can be useful during a gradual return to activity, particularly for someone with previous sprains who has been cleared to return to sport.
It isn't a way to make a fresh, painful injury ready for a game. Tape can also lose support as you sweat and move, so feeling secure at the start doesn't guarantee the same support later.
The BJSM ankle sprain guideline supports exercise-based rehabilitation and appropriate external support. Those tools work together, not as replacements for each other.
Do this instead: If you need tape just to get through ordinary walking, have the injury assessed and review your recovery plan. Don't keep adding layers to hide pain.
A clinician may recommend support for longer during high-risk sport. That's different from depending on tape all day instead of rebuilding function.
What You Need for Ankle Taping
For a traditional closed basketweave, gather:
- Rigid athletic tape, usually 1.5 inches wide
- Thin pre-wrap to help protect skin
- Optional heel and lace pads to protect friction points
- Tape scissors with a blunt tip
- A stable chair and someone trained to help, if possible
Don't apply tape over broken skin, a rash or an area with reduced sensation. If you have circulation problems, neuropathy or fragile skin, get professional advice before trying it.
Start with clean, dry skin. Avoid lotion immediately beforehand. If hair makes removal uncomfortable, careful clipping is gentler than shaving right before taping.
A closed basketweave is harder to apply safely than an elastic wrap. Have an athletic trainer or physical therapist demonstrate it on your ankle first. Written directions are a refresher, not a substitute for hands-on instruction.
How to Tape an Ankle: Step by Step
These steps describe a common application for a typical lateral ankle sprain, the kind involving the outside ligaments. Other injuries may need a different approach. Don't use this on an unassessed injury with significant pain or swelling.
Sit with your lower leg supported and your foot held at about 90 degrees to your shin. Keep that position throughout. Don't force a painful ankle into position.
1. Protect the skin
Place optional pads over the back of the heel and front ankle crease. Apply a thin layer of pre-wrap from the middle of the foot to just above the ankle. Keep it smooth, without bulky folds, and leave the toes visible.
2. Apply the anchors
Place two light, overlapping anchor strips around the lower leg, just above the ankle bones. Add a light forefoot anchor behind the ball of the foot. These give the other strips somewhere to attach.
Lay the tape on rather than pulling it tight around the limb. Anchors should never act like a tourniquet.
3. Add the stirrups
For a typical outside ankle sprain, begin at the inner side of the upper anchor. Run a strip down the inside of the ankle, beneath the heel, and up the outside to the anchor.
Repeat with two more stirrups, overlapping each by roughly half its width. Keep the foot neutral. Don't yank the tape to force the foot inward or outward.
4. Add the horseshoes
Start on one side of the foot anchor, bring a strip around the back of the heel, and attach it on the other side. This forms a U shape around the heel rather than under it.
Add overlapping horseshoes to cover the spaces between the stirrups. Some clinicians alternate stirrups and horseshoes. Either way, avoid wrinkles or concentrated pressure over the ankle bones.
5. Make a figure-8
Start on the top of the foot. Guide the tape across the instep, under the arch, back across the instep, and around the lower leg above the heel before returning toward the starting point.
The path makes an 8 around the foot and ankle. Lay it smoothly, without tightening it around the arch or ankle crease.
6. Add heel locks
Heel locks help secure the heel within the tape. From the front of the ankle, angle the tape around one side, behind the heel, beneath the heel toward the opposite side, and back across the front.
Repeat in the opposite direction to support the other side. This is the easiest part to get wrong. If the path bunches, pinches or feels confusing, stop and have a trained professional show you rather than improvising a tight loop.
7. Finish with closing strips
Use short, overlapping strips to cover exposed pre-wrap and secure loose edges. Work upward without creating a tight circular band. More tape isn't automatically better.
Check comfort and circulation before standing. Then try a few gentle steps if weight-bearing is already comfortable. Remove the tape if it causes pain, pressure or an altered walking pattern.
How Tight Should Athletic Tape Feel?
Supportive, not squeezing. Your toes should stay their usual color and temperature, and you should be able to wiggle them comfortably.
Check immediately after applying tape, again after a few minutes, and during activity. Swelling can change the fit.
Remove the tape promptly if you notice:
- Tingling or numbness
- Cold, pale or blue toes
- Throbbing, burning or increasing pain
- Swelling building below the tape
If normal feeling, warmth and color don't return promptly after removal, seek urgent medical care. Never assume numbness means the tape is working.
Skin Care, Removal and Kinesiology Tape
Remove rigid tape after the activity rather than leaving it on overnight. Sweat and friction can irritate skin, and a taped ankle is harder to monitor.
Use blunt-tipped tape scissors carefully, keeping the skin protected. Peel slowly while supporting the skin. An appropriate adhesive remover can help, but follow its directions and avoid irritated areas.
Kinesiology tape is stretchy and doesn't provide the same mechanical restraint as rigid athletic tape. Some people find it comfortable, but it isn't a reliable substitute for needed support or rehabilitation. Stop using any adhesive that causes itching, blistering or a rash.
Don't Let Ankle Taping Replace Rehab
The mistake I see most often is treating a supported ankle as a recovered ankle. Tape doesn't restore calf strength, comfortable movement or the ability to react when your foot lands awkwardly.
Start with gentle, comfortable ankle movement. Progress toward strengthening and supported balance work as symptoms allow. Our guide to ankle sprain rehab exercises explains why those pieces matter.
For sport, build from walking to jogging, then hopping and direction changes. Use symptoms during activity and the following day to guide progression. Read more about returning to running after a sprain before testing your ankle at speed.
When to See a Doctor
Get assessed rather than taping over the problem if:
- You cannot bear weight or take a few steps
- You have marked tenderness directly over bone
- Your foot becomes numb, cold or changes color
- Pain or swelling is worsening
- You suspect a fracture, or the ankle looks deformed
Persistent instability also deserves attention. Our guide to signs an ankle sprain may be severe can help you recognize when home care isn't enough.
Frequently Asked Questions
Can I tape a freshly sprained ankle?
Not before checking for a serious injury. A very swollen ankle can change size quickly, making rigid tape uncomfortable or unsafe. Get advice about the right support for that stage.
Can I tape my own ankle?
You can learn, but maintaining the correct foot position while applying stirrups and heel locks is difficult. Have a trained professional teach you first.
Can I play sports if my ankle is taped?
Only if your recovery has progressed enough for the activity. Tape doesn't make painful hopping, limping or repeated giving way safe. Return gradually, with professional guidance when needed.
The Bottom Line
Learning how to tape an ankle can give you a useful short-term support option. Keep it comfortable, check your toes, and don't confuse support with healing.
For the recovery work itself, HEM Ankle Rehab offers at-home, step-by-step follow-along videos for new and old ankle injuries. Get serious injuries checked first, then build movement, strength and balance progressively.
Check out HEM Ankle Rehab and start your recovery today.